How to restore backed up data
two methods:
a) on-site - follow read this first !
b) off-site - requires ATX support
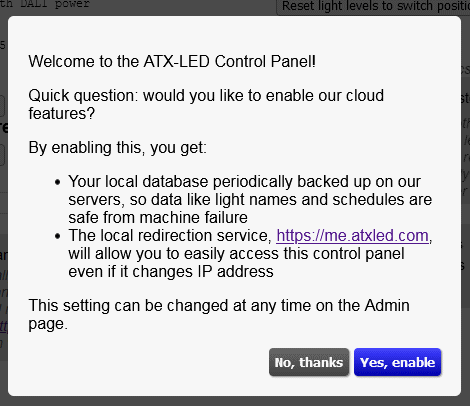
When you enter data into an ATX LED Hub, you should enable the cloud backup feature - unless you are going to restore from a previous backup. When you log in after replacing the SD card - you will see this screen: Click on No Thanks.
See image at right.
If enabled, since your new SD card has no information, your prior info will be lost.
Therefore - if you want to backup to a saved version, please install a new SD card and don't enable backups.
To be safe - contact ATX LED before planning the restore.
|  |
On-Site
Preparing a new SD image - download the image from the web address we gave you, or use the SD Card we sent you.
- install the new SD card and reboot
- assign the SSID to the client network
- do not enable cloud features if asked
- in Admin / click to update to the latest version
- in Admin / click on Restore
- the time of the last backup will be shown,
- accept and you will have your data
- Enable Cloud features and monitoring and backup for the next time
|
Off Site
- using a DIFFERENT public IP address
- start Pi with new SD image, assign to your network
- enable cloud features - contact ATX LED with your Public IP address
- in Admin / click on update
- Wait for ATX LED support to prepare your backup ( they will move the backup to your existing public IP/Mac address location
- in Admin / click on Restore
- this will create an updated SD card image that you can take to the customer site.
|
ATX LED tech support notes
the restore button looks for an image without version number, therefore, when the customer is about to do a backup, copy:
73.166.38.60.5b4f.0432.backup to 73.166.38.60.5b4f.backup
then he can click to restore
|
|